In this article:
Before you start
- What are webhooks and what are they for?
- Why send webhooks from a marketing automation scenario?
- How the webhook works
- What you need to know before you start
What are webhooks and what are they for?
Webhooks are powerful and versatile tools that enable different applications to communicate with each other in real time. When a particular event occurs (such as a new subscription through your subscription form), a webhook automatically triggers an action in a third-party application (such as sending an alert on Teams or adding the new subscriber to your CRM). In addition to event notification, the webhook also sends data in JSON (JavaScript Object Notation) format to the third-party application, using the web address (URL) specified in the webhook configuration. This is a format that can be read by humans and easily manipulated by machines. The data sent can be information from your contacts' fields, plus any other customized information you may wish to include in the webhook.
Why send webhooks from a marketing automation scenario?
It is possible to automate the sending of webhooks from your account to a third-party application through an automated marketing scenario. The action of sending the webhook can be placed directly after the trigger, or when the subscriber reaches a certain point in your scenario.
Here are a few examples of events from which you could automate the sending of a webhook:
- Following subscriber registration through a subscription form
- When a contact is added to a group
- When an e-mail is opened or a link is clicked (from a regular mailing or a specific mailing in your scenario)
- When a subscriber meets specific advanced search criteria (segmentation triggers or conditions)
- When a subscriber responds to a survey
- When a contact's date is reached
- When a contact is updated via a (update profile) form
- When a contact's consent expires or is about to expire
Once you've sent the webhook, you can trigger a host of actions in your favorite applications, such as:
- send messages by e-mail or SMS
- sending alerts on your communications platforms (such as Teams or Slack)
- creating or updating information in your database or CRM, etc.
The possibilities are endless.
How the webhook works
When a contact arrives at the stage where you've inserted the webhook action in your scenario, a webhook request will automatically be sent to the configured web address (URL). If the request is not immediately accepted, it will be considered Pending in the webhook statistics, and we will make further attempts to send it over during the next 12 hours until it is. After this time, if the request has still not been accepted, we will stop trying to send it and it will be classified as Failed.
What you need to know before you start
To use this feature:
- Marketing automation must be included in your plan.
- It is recommended to have some technical knowledge in programming or webhooks to use this feature.
- The application to which you wish to send the webhook must support this technology.
- You need to obtain the URL to which the webhook will send the data. This will be provided by the application receiving the webhook.
- The webhook is sent to the specified URL via an HTTP POST request.
- Find out from the third-party application whether an API key or authentication token is required in order for webhook requests to be accepted
- Consult the API documentation of the receiving application to understand specific requirements, accepted parameters and expected responses.
List of data that can be sent by webhook
Here is a list of possible data that can be included in the webhook payload:
Data from your contacts
| Contact details | Information about the contact's consent | Subscriber's personal statistics |
|---|---|---|
|
|
|
Additional information
You can add key-value pairs to webhook data. For example, the Key could correspond to the name of a field in the destination application. In the Value field, you could enter general, identical information for all your subscribers who will go through this step, or you could associate an external key with the placeholder of a field in your contacts.
To retrieve the placeholder of your account fields, click on the Get placeholders link under the Additional information section in the webhook configuration window.
Headers
It's also possible to add key-value pairs to your webhook headers. This can be useful for including API keys or authentication tokens to secure the requests sent, to identify the source (like an user agent) of the webhook, to specify the data format, or to convey other important information needed to process the webhook.
How to
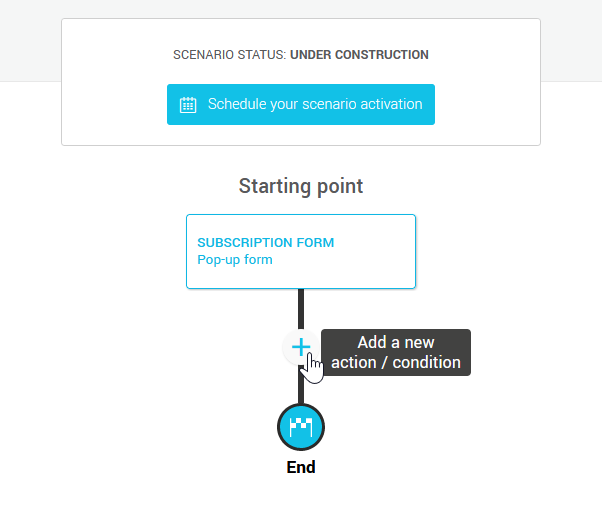
- Create a new scenario. Learn how >
- In your scenario path, press the + (Plus) icon to add an action at the appropriate point.
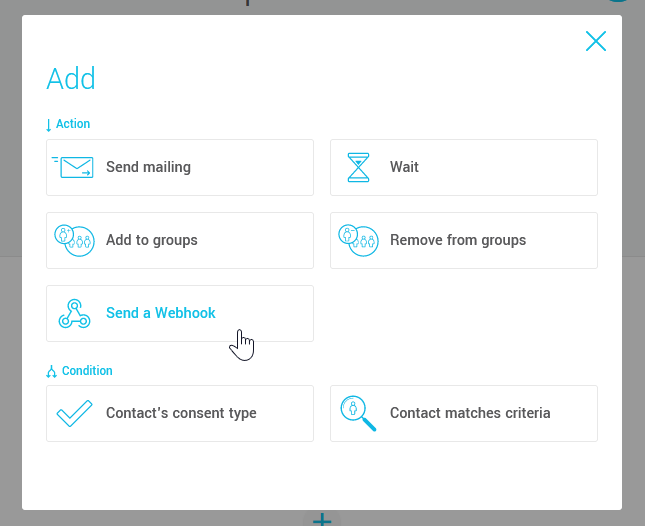
- Select the Send aWebhook action.
- Enter the complete webhook destination URL (including the http or https protocol). This must be retrieved from the application receiving the webhook.
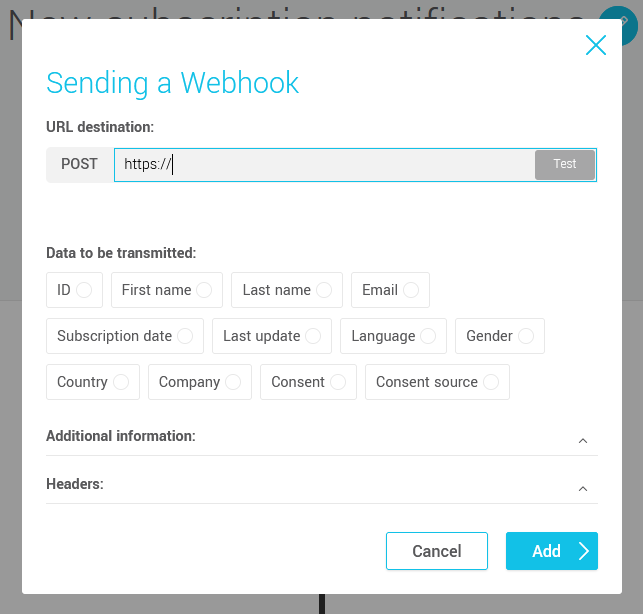
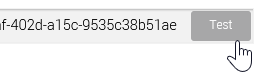
- Press the Test button to the right of the URL field to check the URL's validity.
A webhook request will then be sent to the URL, containing test data such as this:{"id":"test_evt_GppedVq2CWTWxUUxrm26bic0C",
"event":"automation.webhook.send",
"timestamp":"2024-05-28T12:56:40Z",
"idClient":3,
"data":{
"type":"member",
"id":54321,
"email":"john.doe@example.org",
"firstname":"John",
"lastname":"Doe"
}
}
Test result:
A green check mark indicates that the URL is valid and that the request has been accepted (code 200) by the destination application.
.png)
If a red X is displayed, it means that an error has occurred and the connection could not be established. Click on the See error code link in the message for more details.
.png)
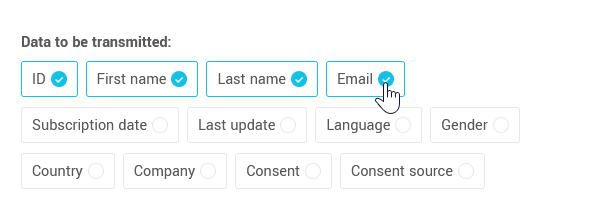
- In the Data to be transmitted section, select the contact information you wish to share with the destination application.
- If required, enter a key-value pair to include additional data or headers in the webhook request.
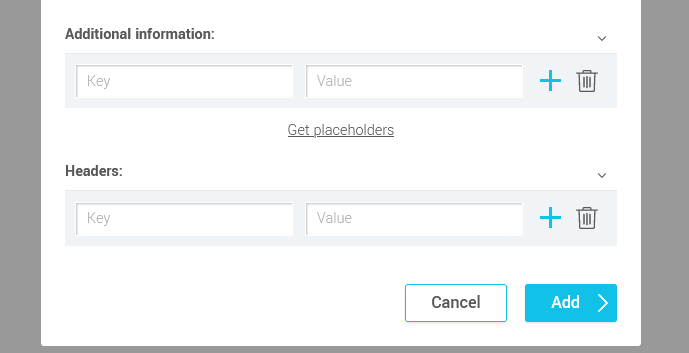
- Click on the Add button to complete the configuration.
Once your scenario is ready, all you have to do is activate it. The webhook will be sent as soon as a contact reaches this step.
Learn how to activate a scenario >
Testing the webhook
To properly test the webhook configuration, you need to activate your scenario and use an email address that meets the criteria for entering your scenario.
Webhook statistics
To retrieve statistics on webhook requests sent, go to the menu and click on the name of the scenario (active or archived) to open it.
Then click on the number of passes above the SEND A WEBHOOK step to access its statistics.

Here you can see:
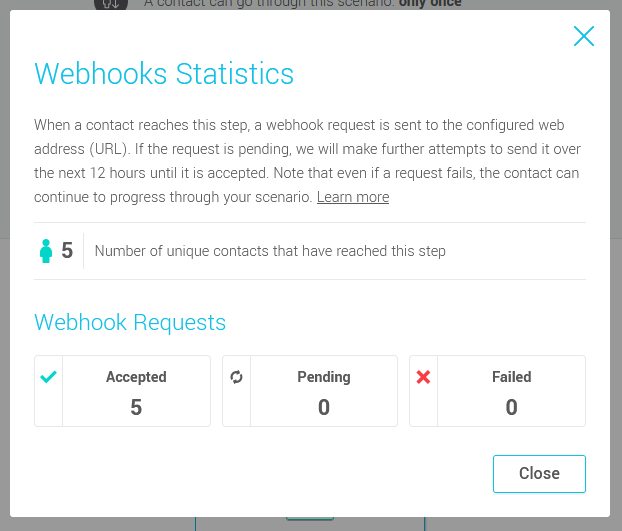
- number of unique contacts who have reached this step
- number of webhook requests accepted
- the number of pending webhook requests
- the number of failed webhook requests (i.e. there will be no further attempts to send these requests)